
Soy Lidia, del canal de Lady Craft Web y en el tutorial de hoy os traigo este precioso álbum con la
colección de Kora Projects, Princess Garden. Es un álbum perfecto
para guardar cualquier tipo de fotografía en él, tanto, fotos de
primavera, de san Valentín, de boda…
Hello everyone!
I am Lidia, from the Lady Craft Web channel and in today's tutorial I bring you this
beautiful album with the Kora Projects collection, Princess Garden.
It is a perfect album to store any type of photography in it, so
much, spring, Valentine's, wedding photos ...

Para realizar este álbum vamos a
cortar dos piezas de cartón de 17x17cm, que serán la portada y
contraportada de nuestro álbum. También cortaremos otra pieza de
17x6cm, que será el lomo del álbum. Puedes comprar el cartón aquí.
To make this album
we are going to cut two pieces of cardboard 17x17cm, which will be
the cover and back cover of our album. We will also cut another piece
of 17x6cm, which will be the back of the album. You can buy the
cardboard here

Con una cartulina blanca, vamos a
forrar todas estas piezas, para formar la estructura de nuestro
álbum.
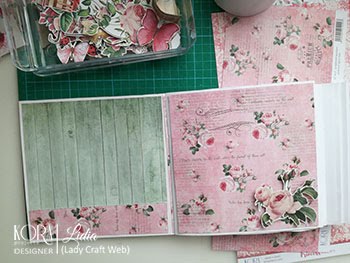
Una vez que tenemos todo forrado, vamos a seleccionar de la colección Princess Garden una hoja para forrar todo el interior. En mi caso, me decanté por este fondo de madera en color mint, que no puede ser más hermoso. 😊
Puedes adquirir la colección aquí.
With a white cardboard, we are going to cover all these pieces, to form the structure of our album.
Once we have everything lined, we will select from the Princess Garden collection a sheet to line the entire interior. In my case, I opted for this wooden background in mint color, which cannot be more beautiful. 😊 You can purchase the collection here


Ahora vamos a cortar algunas piezas más
de cartón, para darle volumen a nuestra portada y a nuestro lomo.
Pueden ser de las medidas que queráis.
Now we are going to cut some more pieces of cardboard, to give volume to our cover and our spine. They can be of the measures you want.

Vamos a seleccionar un papel de la
colección para pegar en la portada y contraportada del álbum. En mi
caso, elegí este fondo rosa de topitos en blanco.
We will select a paper from the collection to paste on the cover and back cover of the album. In my case, I chose this pink background of blank topes.

Con papeles de la colección, cartulina
dorada y la ecopiel vamos a forrar todas nuestras piezas de cartón.
Puedes adquirir la ecopiel aquí.
With collection
papers, gold cardboard and eco-leather we will cover all our
cardboard pieces. You can buy the eco-leather here.


Esta pieza, antes de pegarla voy a
añadirle un poco de cinta de pelo, por todo el contorno, para dar
mayor volumen a la portada. También voy a colocar un cierre metálico
y con cartulina dorada y la ecopiel, voy a crear un cierre.
This piece, before
gluing it, I'm going to add some hair tape, all around the contour,
to give more volume to the cover. I will also place a metallic
closure and with gold cardboard and eco-leather, I will create a
closure.


Ahora pegaremos todos estos elementos a
la portada del álbum.
Now we will paste all these elements to the album cover.

Con la hoja de los recortables de la
colección, vamos a recortarlos, y con algunos de ellos adornaremos
toda la portada. También podemos decorar con algunos adornos que
tengamos por casa o con pegatinas. Puedes comprar los recortables
aquí.
With the sheet of the cut-outs
of the collection, we will cut them, and with some of them we will
decorate the entire cover. We can also decorate with some ornaments
that we have at home or with stickers. You can buy the cutouts here.


Por último, con las piezas de cartón,
posteriormente forradas, las pegaremos al lomo y decoraremos con el
papel, la parte de la contraportada, para finalizar toda la
estructura.
Finally, with the cardboard pieces, subsequently lined, we will glue them to the spine and decorate with the paper, the part of the back cover, to finish the whole structure


Ahora, vamos con la estructura de
nuestro álbum, es una estructura muy fácil. Solo vamos a cortar
seis piezas de cartulina blanca, de 17 cm de ancho y realizando los
siguientes pasos:
*Marcamos con la plegadora
a 17 cm y a 18cm y volvemos a dejar 17 cm y cortamos el papel
sobrante, de esta forma se quedará un pequeño lomo de 1cm.
*Marcamos de nuevo a 17cm
y a 19cm y dejamos 17cm y cortamos, así tendremos un lomo esta vez
de 2cm.
Este mismo proceso lo realizaremos con
todas las cartulinas, dejando asi un lomo de 1cm, de 2cm, de 3cm, de
4cm, de 5cm y de 6cm.
Now, let's go with
the structure of our album, it's a very easy structure. We are only
going to cut six pieces of white cardboard, 17 cm wide and performing
the following steps:
* We mark with the
folder at 17 cm and 18 cm and leave again 17 cm and cut the excess
paper, so that a small spine of 1cm will remain.
* We mark again at
17cm and 19cm and leave 17cm and cut, so we will have a spine this
time of 2cm.
This same process
will be done with all the cards, leaving a spine of 1cm, 2cm, 3cm,
4cm, 5cm and 6cm.

De esta forma como veís, tendremos
seis piezas, donde una tiene un lomo de 1cm, de 2cm, de 3cm, de 4cm,
de 5cm y de 6cm, que es la medida de nuestro lomo.
In this way, as you can see, we will have six pieces, where one has a loin of 1cm, 2cm, 3cm, 4cm, 5cm and 6cm, which is the measure of our loin.

Ahora, vamos a pegar todas estas
piezas, quedándonos una estructura como esta:
Now, we are going to
glue all these pieces, leaving a structure like this:

Antes de pegarlo al lomo, vamos a
decorar todas las páginas, con los die cut de la colección, las
maderitas, tarjetas y otros adornos de decoración.
Before gluing it to the spine, we will decorate all the pages, with the die cut of the collection, the little bags, cards and other decoration ornaments.
You can buy the maderitas here:
- Card sheet.
Una vez decoradas todas las páginas,
ahora sí, vamos a pegarlas a nuestro lomo y de esta forma quedará
todo nuestro álbum montado.
Once all the pages have been
decorated, now we are going to stick them to our spine and in this
way our entire album will be assembled.

Por último, puedes añadir unos
bolsillos ó decoraciones en las tapas del álbum para lograr mayor
capacidad y que se vea más bonito 😊
y ¡listo!
Finally, you can add some pockets or decorations on the album covers to achieve greater capacity and make it look prettier 😊 and voila!


¡Espero que te haya gustado y aquí te
dejo el vídeo donde puedes ver todo el proceso!
I hope you liked it and here is the video where you can see the whole process!
No hay comentarios:
Publicar un comentario