
Hola, qué tal?
How are you doing?
Soy Inma y en Instagram me puedes encontrar como @burbu.site
Hoy vengo a enseñarte mi primer proyecto para Kora Project, que también tienes
disponible el tutorial en su canal de Youtube (espero que te guste ya que soy novata en
mundo del vídeo y lo importante es mejorar, jejeje).
I'm Inma and on Instagram you can find me as @burbu.site. Today I come to show you my first project for Kora Project, which you also have the tutorial available on its YouTube channel (I hope you like it since I'm new to the world of video and the important thing is to improve, hehehe).
En esta ocasión, para empezar el año, he realizado un calendario perpetuo. (solo habría que cambiar el número del año).
Para hacerlo, he utilizado la preciosa antelina rosa flamenco para hacer la estructura y la colección
´mon amour´que me traslada al más bello París que tanto me gusta.
On this occasion, to start the year, I have made a perpetual calendar. To do so, I have used the precious pink suede to make the structure and the ´mon amour´ collection that transports me to the most beautiful Paris that I like so much.

La forma de encuadernar el calendario es con disc para planner, pero puedes utilizar tu
crop a dile y hacer unos pequellos cortes para que entre el disc o con anillas, o incluso
encuadernarlo con cinch.
Para la encuadernación he utilizado el acetato rigido para el borde del cartón y el
acetato de estrellas foil plateado para las "páginas"del calendario.
Como te decía, he utilizado la colección "mon amour" y he recortado sus die cut para
realizar la decoración de la portada junto con el chip board de marco con flores que me
gusta tanto usar.
The way to bind the calendar is with a planner disc, but you can use your crop dile and make some small cuts to fit the disc or with rings, or even bind it with a cinch. For the binding I used the thick acetate for the edge of the cardboard and the silver foil star acetate for the "pages" of the calendar. As I was saying, I have used the "mon amour" collection and I have cut its die cuts to make the decoration of the cover together with the frame chip board with flowers that I like to use so much.

Para hacer las "páginas" del calendario, lo he dividido en 4 secciones:
-Los meses del año
-Los números de la semana(que son dos para hacer los números compuestos y
necesitaremos dos secciones).
-Los días de la semana.
To make the "pages" of the calendar, I have divided it into 4 sections:
-Months of the year
-The numbers of the week (which are two to make the composite numbers and we will need two sections).
-The days of the week.
Yo lo he hecho con sellos para los meses y días de la semana y con troquel de números
para los propios días de la semana. Pero como opción puedes imprimirlo en PC y
recortarlo como tu propio die cut o con lettering y también puede quedar muy bonito.
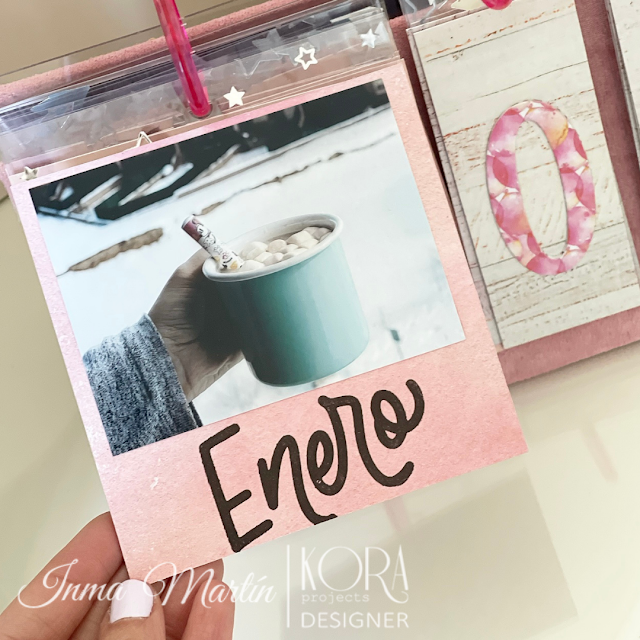
En los meses del año, he utilizado 12 fotos, una para cada mes. En cambio, si no quieres
hacerlo con fotos propias, puedes utilizar fotos de paisajes, de tus propios proyectos o
de cosas que te inspiren y te hacen feliz.
I have done it with stamps for the months and days of the week and with numbers for the days of the week. But as an option you can print it on PC and cut it as your own die cut or with lettering and it can also be very nice. In the months of the year, I have used 12 photos, one for each month. Instead, if you don't want to do it with your own photos, you can use photos of landscapes, your own projects or things that inspire you and make you happy.

Para terminar de decorar, al final he decidido en los días de la semana poner alguno de
los die cut recortados de la colección, ya lo dejo a tu gusto personal.
To finish decorating, in the end I have decided on the days of the week to put some of the cut out die cuts from the collection, I will leave it to your personal taste.

A la hora de unir las páginas con la estructura del calendario que he forrado con antelina, he
añadido el acetato de estrella foil plata a todas las páginas y he realizado los agujeros
en todas ellas para terminar la encuadernación.
At the time of joining the pages with the structure of the calendar that I have lined with suede, I have added the silver foil star acetate to all the pages and I have made the holes in all of them to finish the binding.

Y ¡tachán! ya tenemos nuestro calendario perpetuo... que solo si te aburres de las fotos
puedes ir cambiándolas.
And wow! We already have our perpetual calendar... that only if you get bored with the photos can you change them.

Te animo a que visites el canal de Youtube de Kora Projects donde encontraras el paso a
paso más detallado.
I encourage you to visit the Kora projects YouTube channel where you will find the most detailed step by step.
Espero que te guste tanto como a mí. Un saludo!!
I hope you like it as much as I do. All the best!!
MATERIALES:
**Acetato foil starts plata::
https://koraprojects.com/es/
**Acetato rígido
https://koraprojects.com/es/
**Antelina rosa flamenco:
https://koraprojects.com/es/
**Chip board marco:
https://koraprojects.com/es/
**Colección mon amour:
https://koraprojects.com/es/
**Cola de encadernar:
https://koraprojects.com/es/
VER VIDEO TUTORIAL: aquí
No hay comentarios:
Publicar un comentario