
Hola! Soy Inma de @burbu.site
Hoy traigo este mini álbum de bebé nene para las primeras fotos de un bebé, para regalar o tener un detalle especial. Tienes disponible el tutorial en el canal de Youtube, con el paso a paso para que lo puedas recrear.
Hello! I'm Inma from @burbu.site
Today I bring this mini baby album for the first photos of a baby, to give as a gift or to have a special detail. You have the tutorial available on the YouTube channel, with the step by step so you can recreate it.
En este álbum he querido mezclar estas dos cosas que tanto me gustan.
If you don't know me well yet, I'll tell you that I love making baby albums and hot air balloons, among many other things hehehe. In this album I wanted to mix these two things that I like so much.
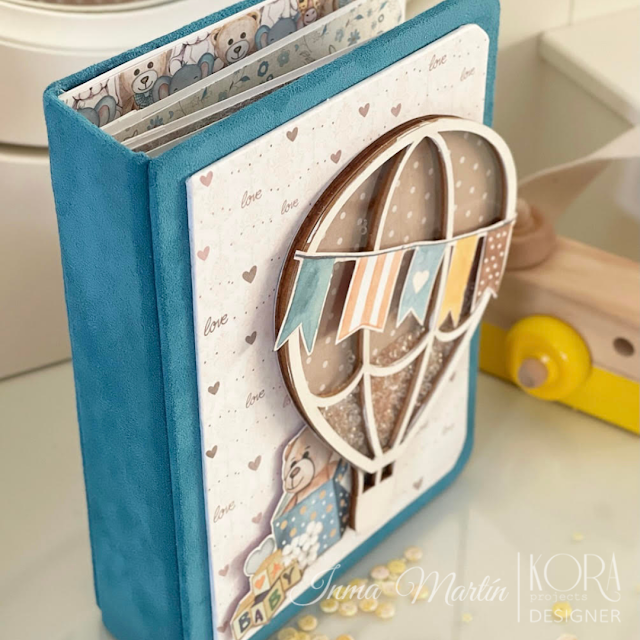
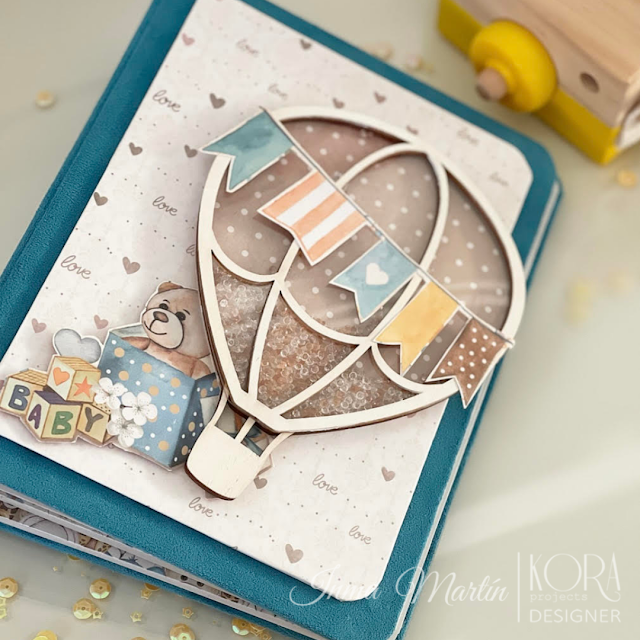
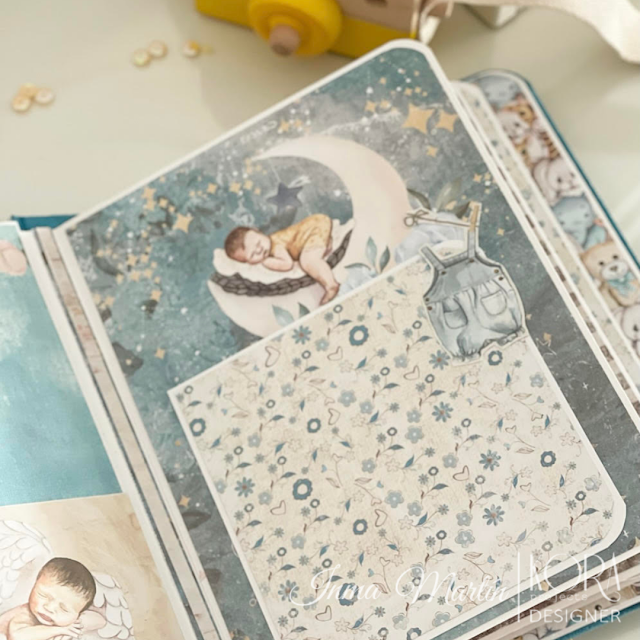
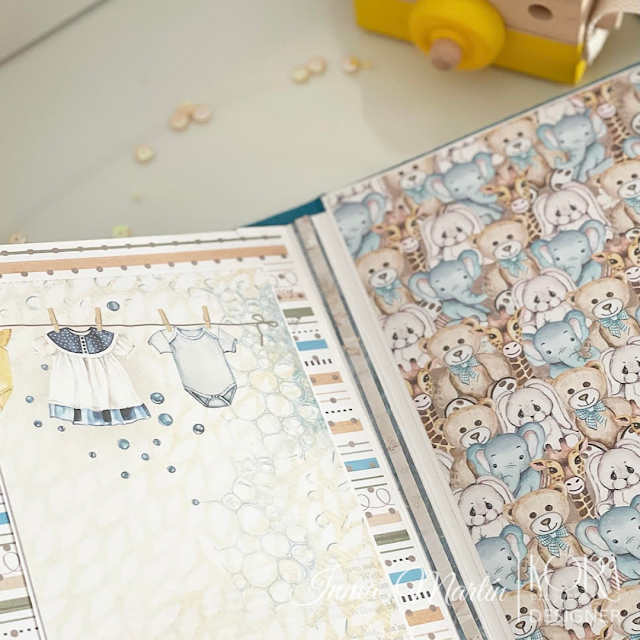
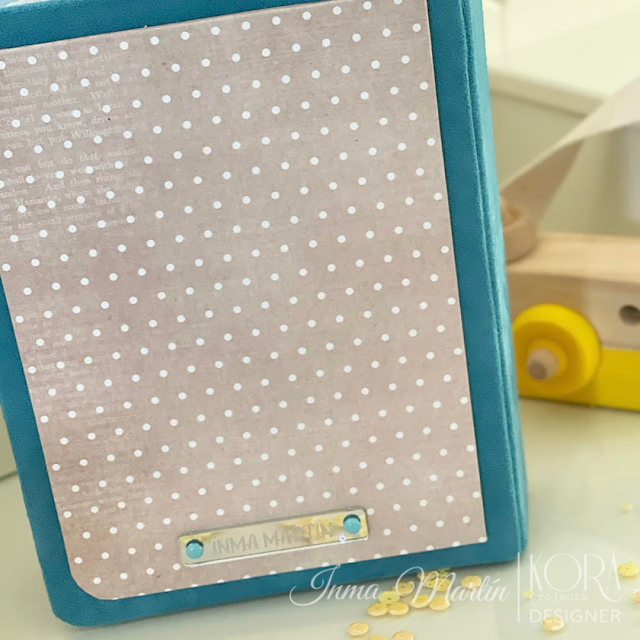
Para realizar el álbum, he elegido la colección "Sweetie Baby", que he combinado con la antelina turquesa y en la portada, como elemento principal, la shacker de globo aerostático.
To make the album, I have chosen the "Sweetie Baby" collection, which I have combined with turquoise suede and on the cover, as the main element, the hot air balloon shacker.
El álbum mide 15 cm de ancho x 20 cm de alto; entonces necesitamos dos cartones de este tamaño (opcional redondear las esquinas que no se unirán al lomo).
También tendremos una segunda capa que medirá 2 cm menos de cada lado (13x18 cm) y redondearemos sólo las esquinas situadas a la derecha.
The album measures 15 cm wide x 20 cm high; then we need two cardboards of this size (optional to round the corners that will not join the spine).
We will also have a second layer that will measure 2 cm less on each side (13x18 cm) and we will round only the corners located on the right.
La portada constará del cartón encuadernado con antelina (cartón de 15x20 cm) y la segunda capa de papel de 13x18 cm, centrada sobre la capa de la antelina.
Para la contraportada haremos lo mismo con las esquinas redondas, pero a la inversa.
Para el lomo, que mide 4x20 cm, lo encuadernaremos con antelina, dejando unas alitas de unos 3 cm a cada lado (puedes hacerlo primero de cartulina para darle consistencia a las alitas para facilitar la encuadernación).
Unimos las 3 piezas pegando la portada al ras del lomo (en la alita que hemos dejado) y después lo mismo con la contraportada: Ésta será nuestra estructura del álbum.
The cover will consist of suede-bound cardboard (15x20 cm cardboard) and the second layer of 13x18 cm paper, centered on the suede layer.
For the back cover we will do the same with the round corners, but in reverse.
For the spine, which measures 4x20 cm, we will bind it with suede, leaving wings of about 3 cm on each side (you can do it first with cardboard to give consistency to the wings to facilitate binding).
We join the 3 pieces by gluing the cover flush with the spine (in the wing that we have left) and then the same with the back cover: This will be our album structure.
Para la espina, necesitaremos 2 cartulinas de 6x19 cm plegadas a 3 y a 4 cm, y otras 2 cartulinas plegadas a 2 y a 3 cm, siendo las cartulinas de 6 cm las que irán en la portada y contraportada; las otras dos son las del centro. Van pegadas, centradas y directamente al lomo, una seguida de la otra.
Las alitas del centro nos sirven para pegar lo que serán nuestras páginas, en total 3.
Las páginas serán de cartulina blanca de 14x19 cm; redondearemos las esquinas que no van pegadas a la espina.
For the spine, we will need 2 6x19 cm cardboard folded at 3 and 4 cm, and another 2 cardboard folded at 2 and 3 cm, the 6 cm cardboard being the ones that will go on the front and back cover; the other two are the ones in the center. They are glued, centered and directly to the spine, one after the other.
The wings in the center are used to paste what will be our pages, a total of 3.
The pages will be 14x19 cm white cardboard; we will round the corners that are not attached to the spine.
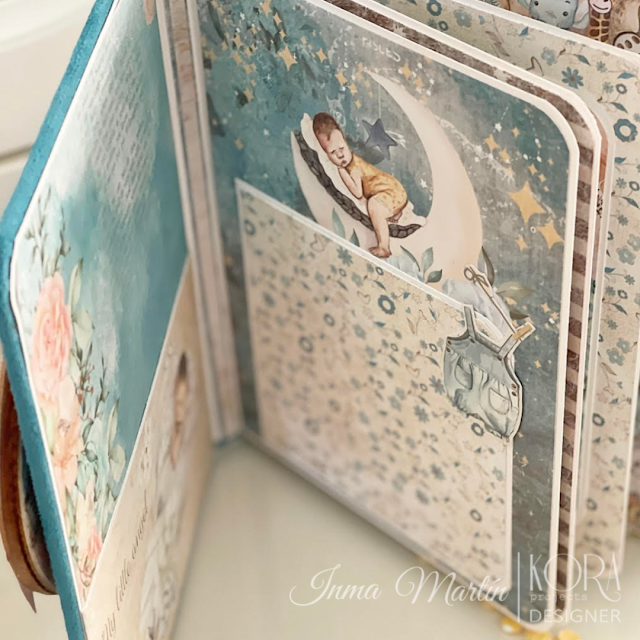
Luego nos queda decorar el álbum. Necesitaremos 6 hojas de papel decorado de la colección "Sweetie Baby" de 13,6x18,6 cm y redondearemos las esquinas que procedan (según caiga la pagina, por delante o por detrás).
Then we have to decorate the album. We will need 6 sheets of decorated paper from the "Sweetie Baby" collection measuring 13.6x18.6 cm and we will round off the appropriate corners (as the page falls, front or back).
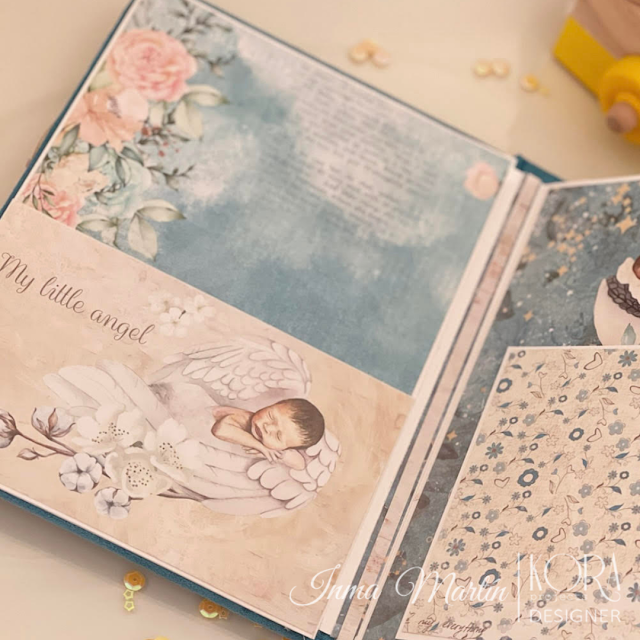
Para decorar las páginas (donde irán las fotos), he utilizado dos tamaños: uno de 11x11 cm de cartulina blanca y 10.6x10.6 cm de papel decorado y 11x16 cm de cartulina blanca y 10.6x15.6 cm de papel decorado (en total de 6).
Para terminar de decorar, he recortado alguna de las ilustraciones de las hojas de la colección, que he utilizado en forma de die cut.
To decorate the pages (where the photos will go), I have used two sizes: one of 11x11 cm of white cardboard and 10.6x10.6 cm of decorated paper and 11x16 cm of white cardboard and 10.6x15.6 cm of decorated paper (in total Of 6).
To finish decorating, I have cut out some of the illustrations from the sheets of the collection, which I have used as a die cut.
Finalizando el álbum, terminaremos de decorar la portada, donde pegaremos la shacker de globo en la segunda capa (la de papel decorado previamente pegada y centrada en la capa de antelina) con algún die cut a tu elección.
En este caso, he recortado el osito de uno de los papeles y también el banderín.
La shacker globo la he rellenado de diamantes acrílicos ambar y transparentes.
Finishing the album, we will finish decorating the cover, where we will stick the balloon shaker on the second layer (the decorated paper previously glued and centered on the suede layer) with a die cut of your choice.
In this case, I have cut out the bear from one of the papers and also the pennant.
I have filled the balloon shaker with both transparent and acrylic diamonds.

Te invito a que visites el canal de Youtube "Kora Projects" donde tienes el tutorial completo de este álbum.
¡Espero que te guste! ¡Nos vemos pronto!
Inma
I invite you to visit the YouTube channel "Kora Projects" where you have the complete tutorial of this album.
I hope you like it! See you soon!
Imma
MATERIALES:
**Colección Sweetie Baby: https://koraprojects.com/es/packs/pack-de-papeles-sweetie-baby.html
**Antelina Turquesa: https://koraprojects.com/es/antelina/antelina-azul-turquesa.html
**Globo shacker: https://koraprojects.com/es/shakers/shaker-globo-aerostatico.html
**Cola de encuadernar: https://koraprojects.com/es/pegamento/cola-de-encuadernacion.html
**Cartulinas blancas: https://koraprojects.com/es/cartones-y-cartulinas/pack-de-25-cartulinas-blancas-20x20-cm.html
**Diamantes acrílicos ambar: https://koraprojects.com/es/adornos/diamantes-acrilicos-ambar.html
**Diamantes acrílicos transparentes: https://koraprojects.com/es/adornos/diamantes-acrilicos-transparentes-25-mm.html
VER VÍDEO TUTORIAL: aquí
No hay comentarios:
Publicar un comentario