
Holaaaa!Hoy @burbu.site al teclado.
En este ocasión, he realizado un álbum de comunión con la nueva colección: "Comunión de niña".
Y como me gusta tanto el resultado del anterior tutorial, hoy también decoramos una libreta que utilizaremos a modo de libro de firmas.
He forrado de antelina rosa flamenco, toda la parte trasera de la libreta incluyendo un par de cm de la portada que he pegado con cola de encuadernar.
Para la propia portada de la libreta, he utilizado un papel de la colección que ya trae el "banner" y, junto con una tarjeta donde pone "libro de firmas, he recortado esta frase y la he utilizado a modo de die cut y lo he pegado en la portada.
Ya tendríamos nuestra libreta de firmas para incluir en el álbum.
And since I like the result of the previous tutorial so much, today we also decorate a notebook that we will use as a signature book.
I have lined the entire back of the notebook with flamingo pink suede, including a couple of cm of the cover that I have glued with binding glue.
For the cover of the notebook itself, I have used a paper from the collection that already includes the "banner" and, together with a card that says "signature book", I have cut out this phrase and used it as a die cut and I have pasted on the cover.
We would already have our signature book to include in the album.

Para el álbum, teniendo en cuenta la medida de la libreta, necesitamos un cartón de 1,5 cm de alto y 1 cm de ancho más de lo que mide nuestra libreta, para portada y contraportada.
En el caso del lomo, será el ancho de la espina por el mismo alto que mide la portada y la contraportada.
Para crear la espina, he realizado unas "montañitas" para pegarlas entre sí y así crear una "falsa espina" (en el canal de Youtube de Kora Projects tienes todas las medidas de plegado para verlo con detalle).
He creado dos montañas para dos páginas, dejando entre medias de ellas 1 cm; después dejo 2 cm donde va colocada la libreta y, a continuación, otras dos montañas para otras dos páginas. De esta forma quedarán dos páginas, libreta y 2 páginas.
For the album, taking into account the size of the notebook, we need a cardboard 1.5 cm high and 1 cm wide more than the size of our notebook, for the front and back covers.
In the case of the spine, it will be the width of the spine times the same height as the front and back covers.
To create the spine, I have made some "mountains" to glue them together and thus create a "false spine" (on the Kora Projects YouTube channel you have all the folding measurements to see it in detail).
I have created two mountains for two pages, leaving 1 cm between them; then I leave 2 cm where the notebook is placed and then another two mountains for two other pages. In this way there will be two pages, notebook and 2 pages.

He decorado la espina de 1 cm con unas tiras de papel decorado de 0,8 cm y de 0,5 cm; ésta última irá sobre la de 0,8 cm y toda la tira decorada pegada a la espina metiéndola por arriba y por abajo.
En esta espina, he puesto cartulina blanca a cada lado, dejando la espina en medio a modo de "sandwich" y su decorada correspondiente pegada encima y a cada lado.
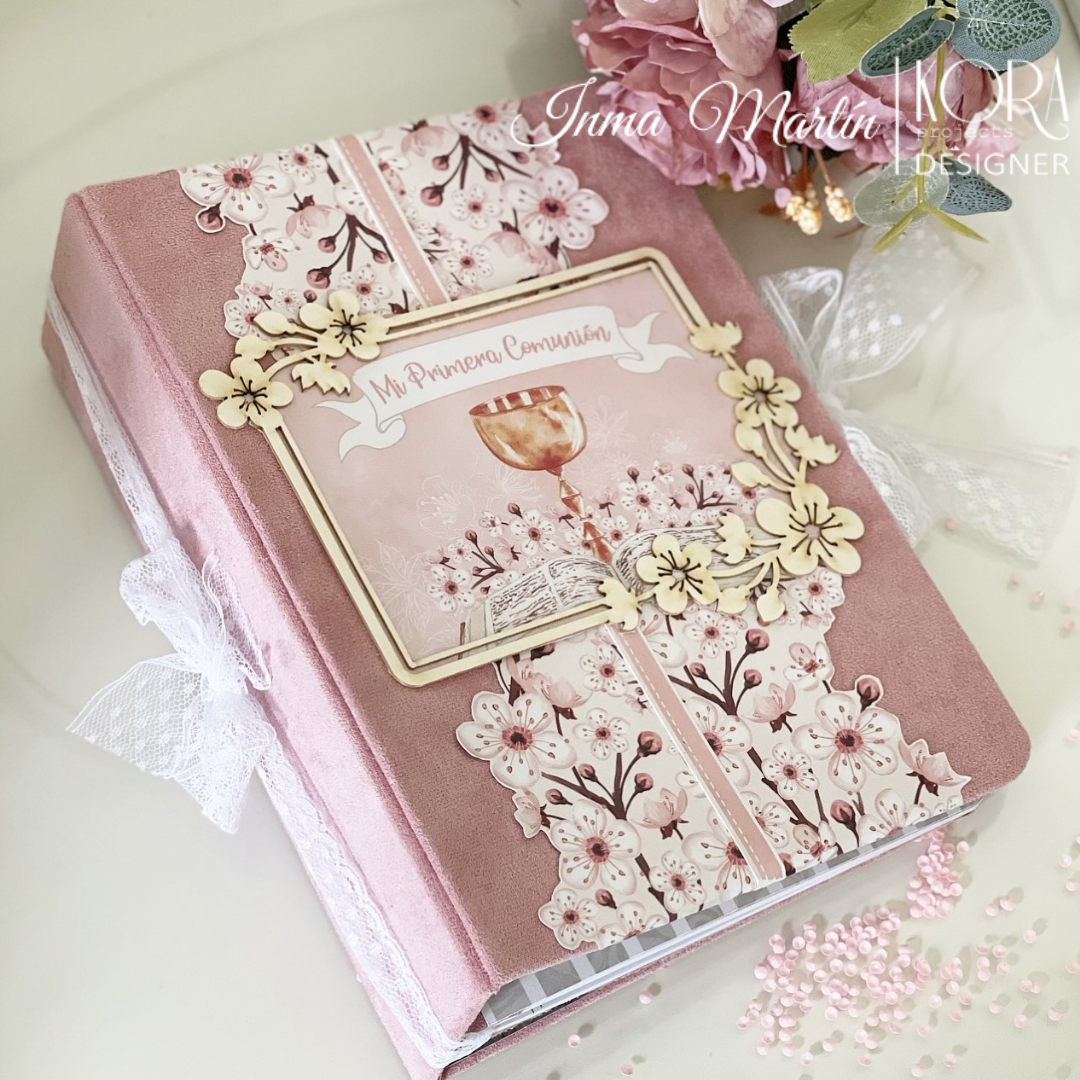
Para decorar la portada del álbum, he recortado las flores de la parte trasera de la colección y las he unido con una tira de papel decorado. Y en el centro, he cogido una tarjeta de la colección con la ilustración de "mi primera comunión" y he puesto encima un chipboard en forma de marco.
I have decorated the 1 cm spine with 0.8 cm and 0.5 cm strips of decorated paper; the latter will go over the 0.8 cm one and the entire decorated strip glued to the spine by inserting it from above and below.
In this spine, I have put white cardboard on each side, leaving the spine in the middle as a "sandwich" and its corresponding decoration glued on top and on each side.
To decorate the album cover, I cut out the flowers from the back of the collection and attached them with a strip of decorated paper. And in the center, I have taken a card from the collection with the illustration of "my first communion" and I have placed a chipboard in the form of a frame on top.

Para unir la libreta a mi estructura, he utilizado una cinta que al anudarlo en el lomo haciendo un nudo con lazo también hace de decoración. Esa cinta es la misma que utilizo de cierre a cada lado de portada y contraportada para cerrar el álbum.
To join the notebook to my structure, I have used a ribbon that, when tied on the spine by making a bowknot, also acts as a decoration. That tape is the same one I use to close the cover on each side of the front and back covers to close the album.

El interior: en este caso, como es un álbum de comunión y no tengo clara la finalidad del mismo o la necesidad de los desplegables en cuanto a la decoración de las fotos, lo he dejado liso. Pero también en el video tutorial, tienes algún ejemplo de cómo poder decorarlo.
The interior: in this case, as it is a communion album and I am not clear about its purpose or the need for the fold-outs in terms of decorating the photos, I have left it plain. But also in the video tutorial, you have some example of how to decorate it.

Los propios recortables de la colección son perfectos para terminar de detallar ya que están pensados para que el proyecto quede precioso.
The cut-outs of the collection are perfect to finish detailing since they are designed so that the project is beautiful.

Te animo a ver el tutorial en el canal de Youtube de Kora Projects, donde tienes el paso a paso y todos los detalles de este álbum de fotos y firmas.
I encourage you to watch the tutorial on the Kora Projects YouTube channel, where you have the step by step and all the details of this photo album and signatures.

INMA
I hope you like it, see you soon. See the VIDEWO TUTORIAL: here
INMA
No hay comentarios:
Publicar un comentario